
Kenmore Dishwasher Not Washing: 10 Proven Fixes To Try!
It’s a common headache for Kenmore dishwasher owners – you press start, the machine hums to life, but your dishes remain disappointingly grimy.
This nagging issue can put a damper on your kitchen routine but worry not.
In this post, we’ll check out why your Kenmore dishwasher is running but not doing its job. Plus, I’ll share DIY solutions to get it cleaning properly again.
Here’s a sneak peek: If your Kenmore dishwasher isn’t washing, it might be because the spray arms are clogged (clean or get new ones), the water inlet valve is acting up (swap it), the pump motor isn’t working right (fix or replace), the filter or drain is blocked (clear it).
Keep reading to learn how to do all that and other alternatives you can try for certain fixes.
Kenmore Dishwasher Not Washing: Causes And Solutions

If your Kenmore dishwasher is failing to clean your dishes, it can be a frustrating ordeal.
Several factors could be at play here, preventing your dishwasher from performing its primary function of washing dishes.
Let’s investigate the potential causes:
Reason 1: Blocked Spray Arms
When the spray Arms within your dishwasher become obstructed, it’s like trying to wash your dishes with a clogged hose.
Debris, mineral deposits, or detergent residue can accumulate within the spray nozzles, limiting the flow of water and reducing the force with which it’s sprayed onto your dishware.
This domino effect disrupts the even distribution of water, leaving your dishes coated in a layer of grime and food particles.
Since a dishwasher has multiple spray arms, some can clean one rack but neglect the other rack.
Kenmore dishwasher not cleaning top rack or bottom rack – both these issues are caused by clogged spray arms.
Step-By-Step Solution To Blocked Spray Arms
Here’s how you can deal with this particular issue:
- For safety, ensure the washer is unplugged or switched off.
- Clear anything that might be blocking your access, like dishes. Take them out so you can reach the spray arm.
- Gently take off the spray arm. You might need to undo a nut, unscrew something, or unclip it. Don’t rush.
- Check the spray arm for anything that might be clogging it. This includes tiny holes or nozzles on its surface.
- Use a toothpick, wire, or small brush to clean these spots.
- Also, check if there’s debris inside the spray arm. Give it a light rinse to get rid of any remaining gunk.
- Examine the spray arm closely for cracks or any weird bending. If it looks damaged, consider getting a new one.
- Rinse the spray arm thoroughly to remove any remaining bits. Carefully put it back where it belongs.
- Make sure it’s snug.
- Close the dishwasher, turn it on, and run a cycle without dishes. Watch to see if the spray arm spins and sprays water evenly. If it does, you’re good to go!
Reason 2: Dysfunctional Dishwasher Pump
Your dishwasher relies heavily on the dishwasher pump for both filling and draining.
When this critical component doesn’t operate as expected, it creates a ripple effect of issues.
The dishwasher’s drain pump may struggle to remove used water efficiently, while the wash pump might not circulate water with the necessary force to clean your dishes thoroughly.
Step-By-Step Solution To Dysfunctional Dishwasher Pump
So, how do you take care of this? Follow these instructions:
- Ensure the dishwasher is safely disconnected from power sources.
- Check for visible damage or obstructions in the dishwasher pumps.
- Remove any debris you find.
- Turn the dishwasher back on and listen for the pump motor.
- If it’s not running or making unusual sounds, replace it.
Reason 3: Obstructed Filtration System
Your Kenmore dishwasher’s filtration system acts as the gatekeeper for debris and contaminants.
As water flows through this system, it captures and holds onto particles that could otherwise redeposit onto your dishes.
However, an obstructed or damaged filtration system can no longer effectively trap these contaminants.
This results in a dirty dishwasher interior and a less efficient cleaning process as debris and mineral deposits re-enter the wash cycle.
Step-By-Step Solution To Obstructed Filtration System
Here’s the best way to take care of the filter:
- Disconnect the dishwasher from power.
- Remove the bottom rack to access the filtration system.
- Unscrew or unclip the filter cover.
- Remove and clean the filter and any debris trapped in the filter housing.
- Rinse it thoroughly under running water.
- Reassemble the filter components and the bottom rack.
Reason 4: Issues with Water Quality
The quality of the water entering your dishwasher plays a pivotal role in the cleaning process. If you have hard water with a high mineral content, it can be problematic.
The dishwasher’s components, including the spray arms and filtration system, can gradually accumulate mineral deposits.
These deposits hinder water distribution, impede detergent action, and ultimately compromise the cleanliness of your dishes.
Step-By-Step Solution To Issues with Water Quality
You don’t need to do much here.
Taking care of this is actually pretty easy- you just have to consider installing a water softener or using water-softening agents to reduce mineral buildup in your dishwasher.
That, and clean the washer with vinegar or a dishwasher cleaner often to get rid of mineral deposits.
Reason 5: Detergent Problems

Selecting the appropriate detergent and using the correct amount is a must for optimal cleaning performance.
If you choose the wrong type of detergent for your dishwasher or use too little of it, the detergent may struggle to break down grease, food particles, and stains on your dishes.
This can result in dishes that are inadequately cleaned, even after a full wash cycle.
Step-By-Step Solution To Detergent Problems
Same as earlier, the fix isn’t that deep. Just make sure you’re using the right dishwasher detergent.
Check your dishwasher’s manual or the detergent label to be sure they match up. You don’t want to use something that your dishwasher doesn’t like.
Reason 6: Incorrect Dishware Placement
The arrangement of your dishware inside the dishwasher matters more than you might think.
When dishes are loaded improperly or overcrowded, it can obstruct the rotation of the spray arms, preventing water from reaching all areas of your dishwasher.
As a result, certain items may not undergo proper cleaning due to the hindrance caused by their neighboring dishes.
Step-By-Step Solution To Incorrect Dishware Placement
The answer’s pretty obvious here. Loading your dishes properly in the dishwasher can make a big difference.
So, check out your dishwasher’s manual for tips on how to do it right.
My own advice – don’t stuff it too full, or the water won’t be able to reach everything. Spread your dishes out nicely so they get cleaned properly.
Reason 7: Malfunctioning Temperature Control
Temperature control plays a pivotal role in the cleaning process as it influences the effectiveness of detergent.
A malfunctioning heating element or thermostat can result in inconsistent water temperatures throughout the cycle.
This can prevent detergent from dissolving properly and hinder its ability to remove tough stains and grime from your dishes.
Step-By-Step Solution To Malfunctioning Temperature Control
Don’t worry, this isn’t as complicated as it sounds. Let me walk you through the fix.
- Look for loose or disconnected wires in your dishwasher.
- If you find any, gently reconnect them to their proper places.
- Some dishwashers allow you to adjust the temperature settings.
- Check your dishwasher’s manual for instructions on how to do this, similar to setting your thermostat at home.
- Find a small sensor inside your dishwasher, like a mini-thermometer.
- Make sure it’s clean and not covered in grime. Cleaning it might solve temperature issues.
- If you have a multimeter, you can use it to check the thermostat’s health. Check your dishwasher’s manual for guidance on how to perform this test.
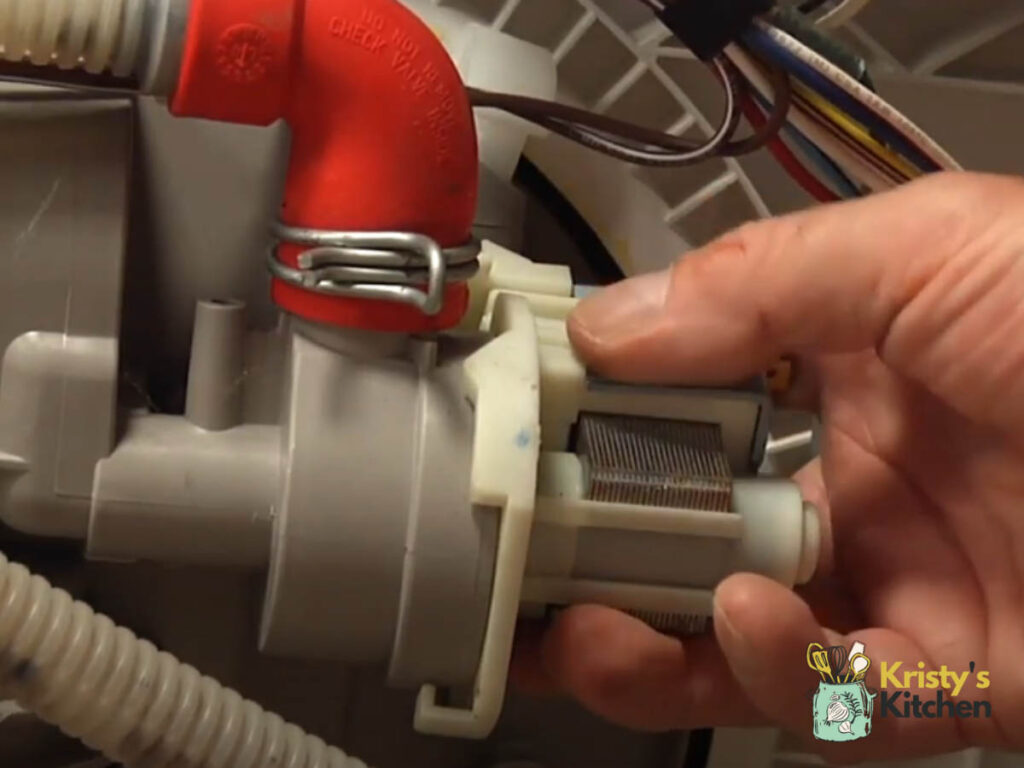
Reason 8: Broken Water Intake Valve
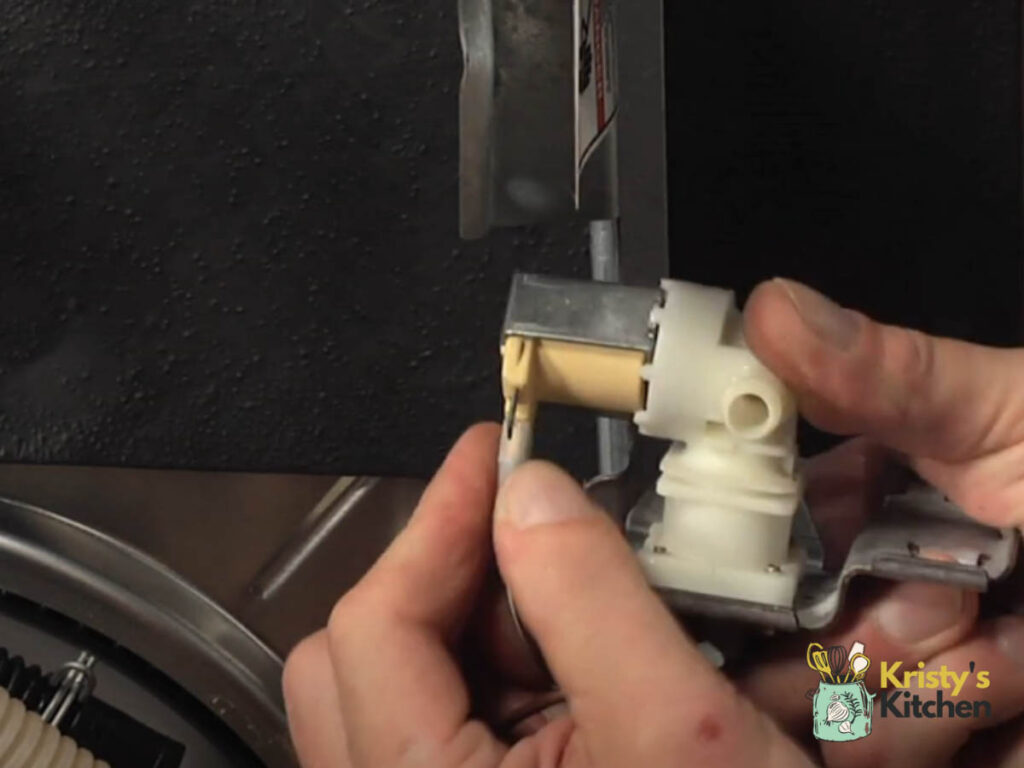
The water intake valve acts as the gateway for water to enter the dishwasher.
If this valve is faulty, it can lead to insufficient water supply, disrupting the dishwasher’s operation.
That inadequate water intake can result in a wonky cleaning cycle and dirty dishes, as there won’t be enough water to properly clean and rinse them.
Step-By-Step Solution To Broken Water Intake Valve
Follow these instructions to fix the water intake valve:
- Unplug your dishwasher and turn off its water supply.
- Look closely at the water intake valve.
- Check for damage, rust, or anything blocking it, like dirt.
- If you find buildup, gently clean it off.
- Ensure all hoses and connections are secure and not corroded.
- Plug your dishwasher back in and run a test cycle.
- See if the valve opens to let water in and closes when it’s not needed.
- While the dishwasher is running and after the cycle, check for any water leaks around the valve and connections.
- If cleaning and checking didn’t solve the problem, you might need a new valve. Consult your dishwasher’s manual or a technician for replacement guidance.
Reason 9: Motor Obstruction
An obstructed motor can disrupt the mechanical components essential for water circulation.
When the motor struggles to operate correctly, it hinders your dishwasher’s ability to agitate water effectively, ultimately impeding the cleaning process.
This obstruction can stem from foreign objects such as debris, food particles, or even a toothpick that has inadvertently made its way into the dishwasher’s internal mechanisms.
Step-By-Step Solution To Motor Obstruction
This is how you deal with a messed-up motor:
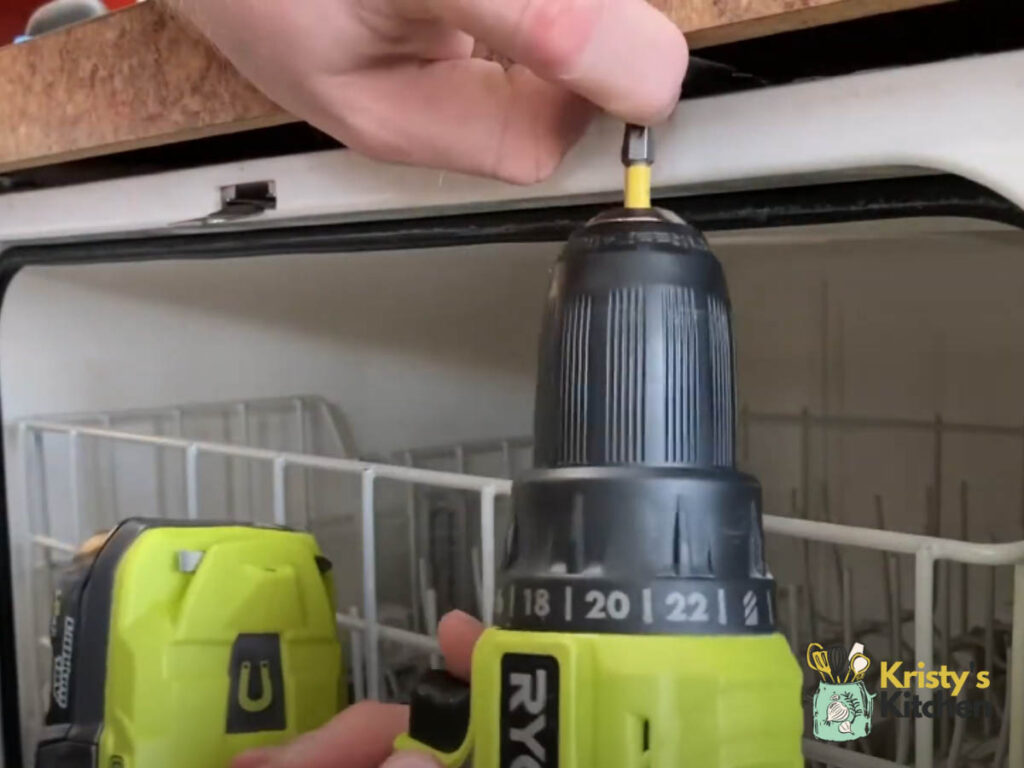
- Make sure the dishwasher is disconnected from power. Unplug it or turn off the circuit breaker.
- Find the motor – it’s usually down at the bottom, near the pump.
- Open the front panel or kickplate to access it.
- Look around the motor area for anything that shouldn’t be there, like food bits, utensils, or small objects.
- Depending on what you see, grab tools like pliers, tweezers and a flashlight to help you remove the obstruction.
- Carefully take out whatever is causing the motor to get stuck. Be gentle to avoid damage.
- After removing the blockage, inspect it visually. Check if any wires are loose or damaged, and see if anything looks burnt or melted.
- Get a multimeter. Set it to the resistance or continuity mode (it might make a sound or show “0”).
- Then, touch one probe to one part of the motor and the other probe to another.
- If it beeps or shows “0,” it’s likely the motor is okay. If it stays quiet, there might be an issue with it and might need to be replaced.
- Once you’re sure the motor is clear and in good shape, reassemble the dishwasher. Reattach the front panel or kickplate.
- Plug the dishwasher back in or turn the circuit breaker on to give it power again.
- Run a test cycle with an empty dishwasher to make sure the motor works well and the cleaning process is back to normal.
When To Seek Professional Help
Even if you’re handy with DIY, there are times when it’s smart to get professional help with your dishwasher:
- Electrical Trouble: If you suspect problems with wiring or the dishwasher’s controls, it’s best to leave it to experts. Electricity can be risky if you’re not sure what you’re doing.
- Big Part Replacements: Swapping out things like the motor, pump, or heating element is better left to the pros. These jobs need special tools and know-how.
- Warranty Rules: Check your warranty terms. Trying your own repairs on a covered issue might cancel the warranty. It’s safer to let the manufacturer’s service team handle it.
- Play it Safe: If anything makes you unsure or uneasy about a DIY repair, especially if it involves taking apart big pieces or messing with electrical stuff, it’s just safer to call a pro.
- Time Crunch: Pros can often sort out problems quicker, which can be a big help if you’re pressed for time.
Tips To Avoid Such Problems In The Future

Following the below tips will help keep your Kenmore dishwasher running smoothly, ensuring it cleans your dishes effectively without any hiccups.
- Use Rinse Aid: Even if your detergent has it, using rinse aid can help dishes come out cleaner and drier. It’s an easy extra step for better results.
- Clean Filters Regularly: Kenmore dishwashers have filters that catch gunk. Check and clean them once in a while so they don’t get clogged and slow things down.
- Hot Water Matters: Your dishwasher needs hot water to work well. Ensure your water heater is set to about 120°F (or 49°C) so your dishes get properly cleaned.
- Run a Cleaning Cycle: Kenmore dishwashers often have a cleaning cycle. Use it now and then with a dishwasher cleaner to get rid of buildup and soap scum.
- Keep the Door Seal Clean: Check the rubber seal around the dishwasher door. If it’s dirty or damaged, clean it or get it fixed. A good seal prevents leaks and helps your dishwasher do its job.
- Deal with Hard Water: If you have hard water, use softeners or additives to prevent mineral buildup that affects dishwasher performance.
- Don’t Overload: Don’t cram in too many dishes; it can mess up water flow. Follow any specific loading instructions in your dishwasher manual.
- Keep The Spray Arms Free: Load dishes wisely. Don’t block the spinning arms that shoot water onto your dishes.
FAQs
Why is my Kenmore dishwasher not filling with water?
It might be the water inlet valve, supply line, or control board causing the issue. Check these components for problems.
Does a Kenmore have a reset button?
Usually, Kenmore dishwashers don’t have a reset button.
How do you reset a Kenmore dishwasher?
To reset a Kenmore dishwasher you can try pressing “Heated Dry” or “High-Temp Wash,” and then “Start/Resume” to reset it.
How do I put my Kenmore dishwasher in diagnostic mode?
To get into diagnostic mode on your Kenmore dishwasher, just quickly press these buttons in this order: Heated Dry – Normal Wash – Heated Dry – Normal Wash.
Final Thoughts
Now that you’ve got these easy fixes in your toolkit, there’s no need to stress over a malfunctioning dishwasher.
So, take a deep breath, dive into the troubleshooting, and soon enough, your Kenmore dishwasher will be back to making your life easier.